Goldy
the Robot
Goldy the Robot was created by assembling Poser props from the Props library. For this example, she will use a skeleton belonging to an existing library figure and adjusted as necessary.
1. Begin by launching Poser and importing the file goldy.obj from your Poser Pro Pack CD’s Documentation\Samples folder:

2. Set both Full Tracking and the Texture Shaded document display style, and enter the Setup Room. Set the Front camera. Goldy should now appear as follows:

3. Open the Figure library and select Figures>Poser 2 Lo>Default Guy. Click the Change Figure button to load the skeleton. Note that you can also begin at the hip and create a skeleton from scratch, just as you did with Wormy:

4. Select the Translate tool and position the bones on your left (Goldy’s right) side and center (Outline view shown for maximum contrast).
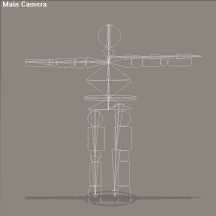
5. Select Figure>Symmetry> Right to Left. Click Yes when prompted to copy joint zone setups. Goldy’s skeleton should now look something like this:

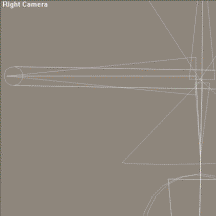
6. Goldy’s bones are now aligned side to side. Select a side view (or multiple pane view) and adjust the front-to-back alignment. As in the previous step, you can use symmetry to save time. When you are finished, select the Main camera and fly around Goldy to make sure that the skeleton is correctly placed.
7. At this point, you could use the Auto Group tool. However, Goldy’s hoop will not work properly, since the Grouping Tool will assign its polygons to the hips and abdomen, causing the hoop to distort or break as Goldy moves. To prevent this, select a side view, select the abdomen bone, and draw a new bone protruding from Goldy’s center to the hoop.
8. The Auto Group tool will assign some of the hoop polygons to the bone you created, and others to the hip, thighs, etc. Simply select the group corresponding to the bone you created in the previous step, and add the rest of the hoop polygons to the group to make the hoop move properly.

9. Check all of the groups to ensure that the correct polygons are assigned to each group. Make any necessary adjustments. When you are finished, exit the Setup Room and try posing Goldy.
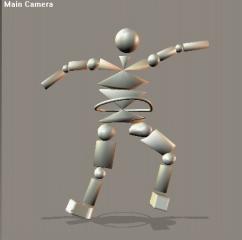
10. Not too bad for a few minutes’ work. Still, to make Goldy move like a robot instead of an organic figure, you will need to adjust the joint parameters. You may also need to adjust the bones and/or turn off body part bending by selecting body parts and disabling bending in the Properties dialog as well. The Poser scene Goldy_Raw.pz3 in your Poser Pro Pack CD’s Documentation\Samples folder shows Goldy just after leaving the Setup Room. Goldy_Adjusted.pz3 in the same folder shows Goldy after her joint parameters and bones have been adjusted. Notice how she now moves like the robot she is. Load this file, select each joint, and note its parameters. Try using the Walk Designer and playing the resulting animation.

11. The final step is to make Goldy gold. To do this, open the Surface Materials dialog and set the ambient and reflective colors as follows:
· Red: 255
· Green: 230
· Blue: 75
Set the Reflection Map Strength to 100% and check the Multiply through Object Color box. Render the scene to see Goldy in all her glory!
